How I built the Stranger Things alphabet board with 3D printing, LEDs and a healthy dose of geekiness.
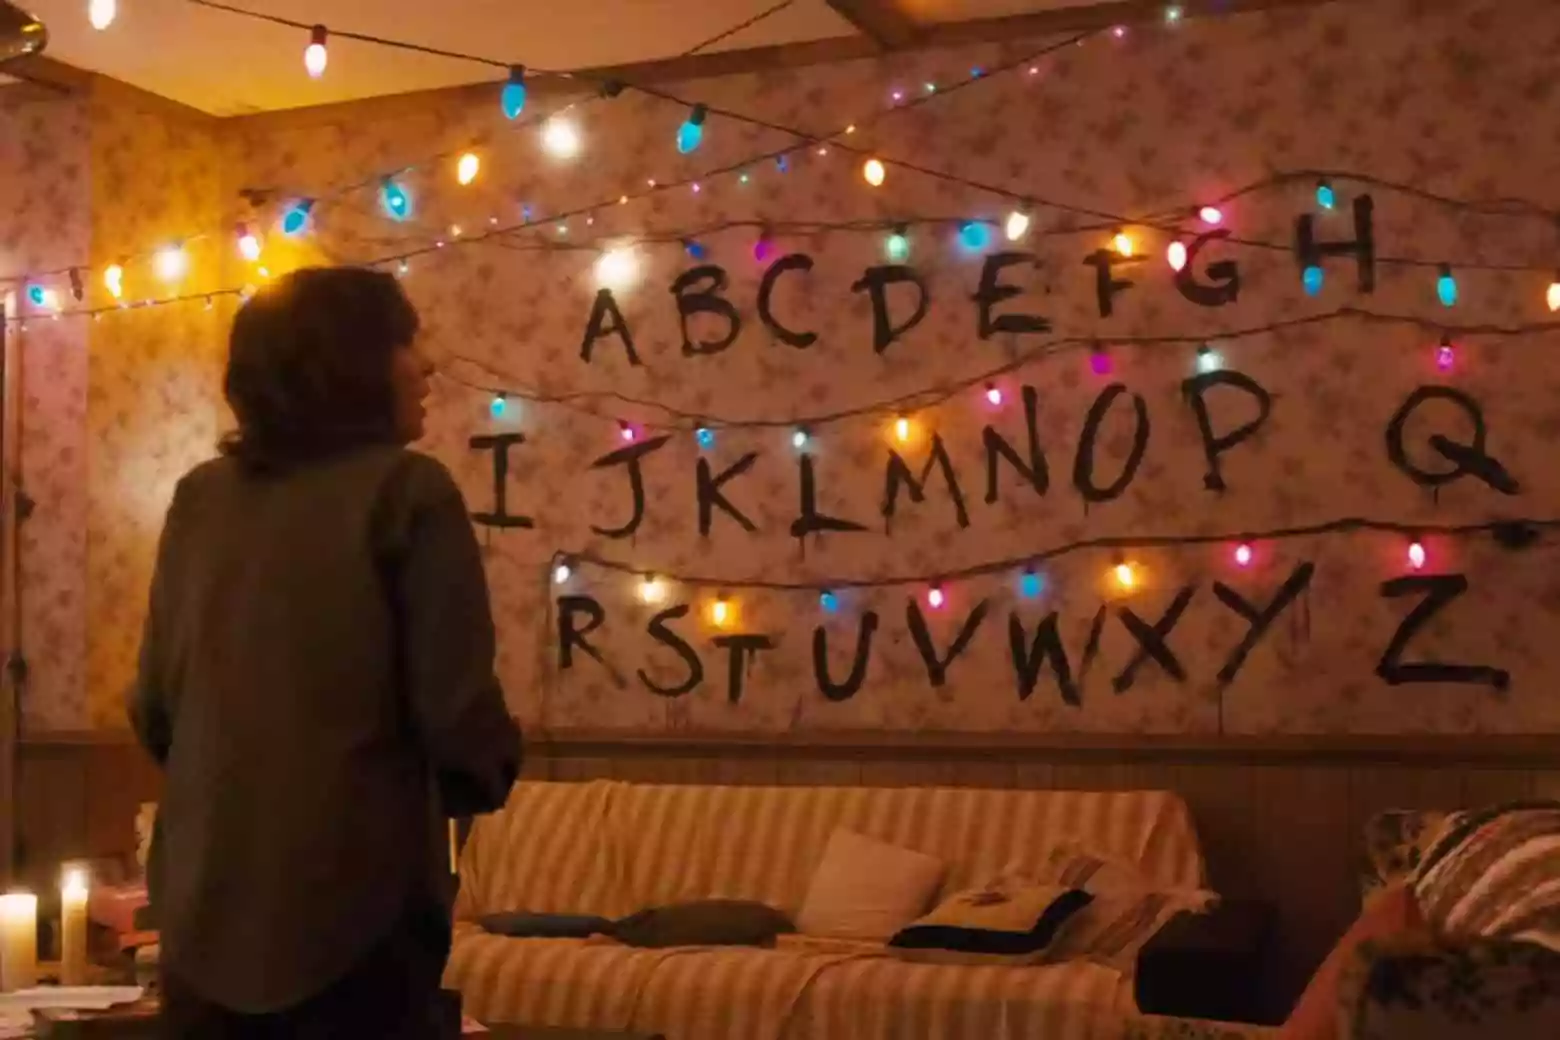
My daughter is a hardcore Stranger Things fan. When I started thinking about a special gift for her, the idea arrived almost like a message flickering through Joyce Byers’ Christmas lights: build her the wall. That iconic scene — the hand-painted alphabet, the coloured bulbs blinking in code to communicate from the Upside Down — is one of the most recognisable images in the entire show. I had to recreate it.
Once the inspiration struck, I started searching online to see if anyone in the maker community had already modelled those distinctive bulbs in 3D.
They had not disappointed.
The bulbs and the alphabeth
I found a beautifully done set of 3D-printable Christmas bulbs that faithfully replicate the rounded, retro shape of the lights used on set: Stranger Things Lightbulbs
So, I printed quite a few of them, in various colors.

Searching a little further, I also found a full alphabet set: letters that reproduce exactly the jagged, unsettling font from the show, with all those ’80s horror-movie details that make them instantly recognisable: Stranger Things Alphabet

The frame and the background
With the models ready to print, I turned to the physical structure. I chose an IKEA RÖDALM frame in the 70×100 cm format — large enough to fit all 26 letters across three rows, with room for the lights. I fully disassembled it, removing the glass, the white passepartout and the backing board.


For the background I needed something that echoed the Byers’ wallpaper: that worn, floral texture typical of an ’80s American home. I found sheets of handmade marbled paper — with their golden veining, ochre blotches and dark red speckles — that came very close to the right atmosphere. I glued them directly onto the backing board, placing two sheets side by side to cover the entire surface.

The electronics: WS2811 LED strip
Once all the bulbs and letters were printed, came the most technical part: making the lights turn on, off and flicker independently, just like in the show. I used a strip of 26 WS2811 LEDs — one per letter of the alphabet. WS2811s are individually addressable: each bulb can have its own colour and its own timing, controlled through a single data wire. The LED strip in the link is perfectly sized to fit neatly inside the bulbs.
The LEDs sit inside the 3D-printed bulbs, which diffuse the light softly and in colour, exactly like the ones in the series. The black cable connecting them runs along the top edge of the frame, hidden behind the border.

The software
The firmware I wrote — available on GitHub at github.com/stefanobertini/stranger-text — runs on an ESP32-C3 microcontroller and turns the board into a self-contained networked device. No app, no cloud, no external service: everything runs on the chip itself.
The web interface is served directly from the ESP32’s onboard flash (LittleFS) and consists of three pages reachable from any browser on the same network:
Main page
The page includes a textarea where you can write a message and a button to send it to the device and start the display.
Additionally, the **History** button allows access to a page where the system automatically stores the last 50 sent messages in the browser’s local storage.
From the history page, by pressing the various buttons, you can:
- Send: automatically send the selected message
- Copy: return to the sending page with the selected message pre-filled in the textarea, ready to be edited
- Delete: remove the selected message from the history
- Close: return to the main page


Settings page

Configuring the timing
Every aspect of the display rhythm can be tuned from the Settings page. All values are expressed in milliseconds and use a min–max range rather than a fixed value — a random number is drawn within the range for each letter, making the writing feel organic and irregular rather than mechanical.
Parameter: Write Delay
Description: How long a letter LED stays on (on-time per letter)
Default: 450 – 550 ms
Parameter: Erase Delay
Description: Dark pause between one letter and the next
Default: 72 – 88 ms
Parameter: Space Delay
Description: Pause inserted for spaces and newlines
Default: 630 – 770 ms
Parameter: Blink Count
Description: Number of random blink cycles before writing starts
Default: 8 – 15 ms
Parameter: Leds per Blink
Description: Min/max LEDs lit simultaneously per blink cycle
Default: 1 – 6 leds
Parameter: Blink Delay
Description: Duration of each blink cycle
Default: 80 – 120 ms
WiFi page
This page allows you to connect the device to a Wi-Fi network. When opened, the list of **available networks** is automatically populated with all reachable Wi-Fi networks.
By selecting one, its value will be filled into the SSID field. If the network you want to connect to is hidden, you can manually enter its name.
Once the password is also provided, the system will attempt to connect using the supplied configuration.
If successful, it will save the parameters to NVRAM to make them persistent. Otherwise, it will revert to Access Point mode.

Joining a WiFi network
Out of the box — or rather, straight after flashing — the ESP32 has no WiFi credentials stored. On every boot, it first attempts to connect to any saved network. If no credentials are found (or the connection times out after 15 seconds), it automatically falls back to Access Point mode, creating its own network.
Default parameters are:
How a message is displayed
When a message is sent, the board goes through a precise multi-stage pipeline designed to replicate the erratic, haunted behaviour of the lights in the show:
The final result
The result is a living object that can light up and “speak” — somewhere between art, nostalgia and small electronic magic.
Links
Stranger Text Firmware: https://github.com/stefanobertini/stranger-text
3D Light Bulbs: https://makerworld.com/it/models/1994237-stranger-things-lichterkette-lightbulb
3D Alphabeth: https://makerworld.com/it/models/2038000-stranger-things-alphabet
ESP32 board on Amazon: https://www.amazon.it/dp/B0DMNBWTFD
3D WS2811 Led Strip: https://www.amazon.it/dp/B06XD72LYM
Thanks to Jack Pop and Missing Element for the fantastic 3D files.
If you print and use their files, don’t forget to give them a boost on MakerWorld.